Design a site like this with WordPress.com
Get started

Biscuits: Appalachian Staple

finished biscuits made with a crimped cutter

As a Southern woman, or more technically an Appalachian woman (let’s not get into the argument of whether Garrett County, MD, is more like MD or like WV and how your answer to that question colors your idea of if I’m Southern or not. Southern Living magazine called GC the Snow Capital of the South, so I’m taking that as the definitive answer!) I was born into the tradition of making biscuits.

I grew up with the recipe from the Better Homes and Gardens cookbook with the red-checked cover. Once I moved out, I didn’t get to take it with, but my mom gave me a cookbook with a biscuit recipe that we found from a yard sale. It’s the Ladies Home Journal Cookbook. Definitely a classic—1963 edition. It even came with a letter to dearest Joanie, from Linda, Bill, and Lulu, complete with a date pinwheel recipe I’ve never tried. I honestly use it as a bookmark for this biscuit recipe, which is one of only 2 recipes I’ve ever made from this cookbook, the other being a quiche Lorraine (I need to make that again, come to think of it—it’s marked with plain paper, yawn, but the recipe is not a yawn).

that famous bookmark!

Anyway, let’s make some biscuits!

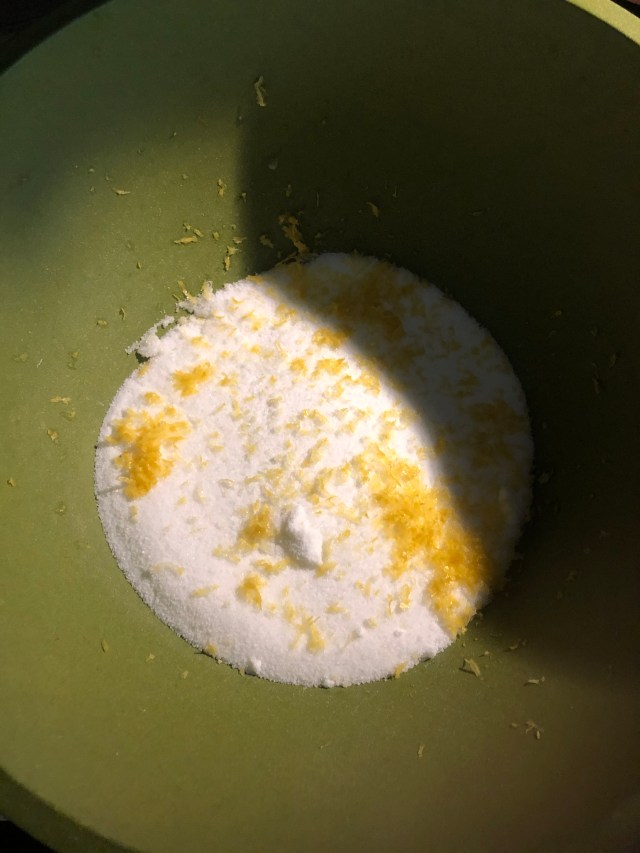
To start, you need a decent sized mixing bowl. Take about 2 cups of flour, ¾ tsp of salt (you can get away with ½ tsp, honestly), 1 T. of baking powder, and 1 T. of sugar. The original recipe does not include the sugar, but it’s necessary. The first few times I tried it, it was omitted, and the biscuits were just missing something. It was the sugar. It’s not much, but it is important.

first, combine the dry ingredients

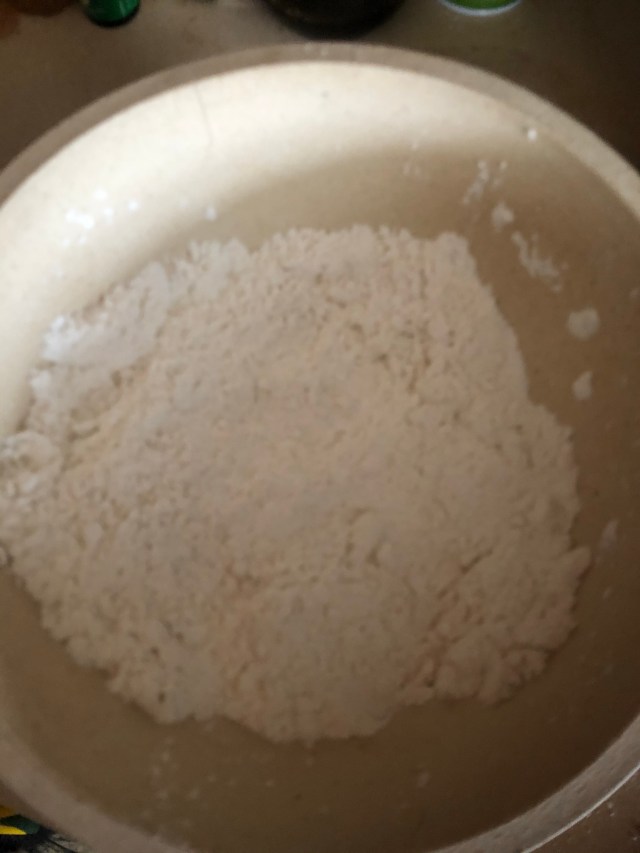
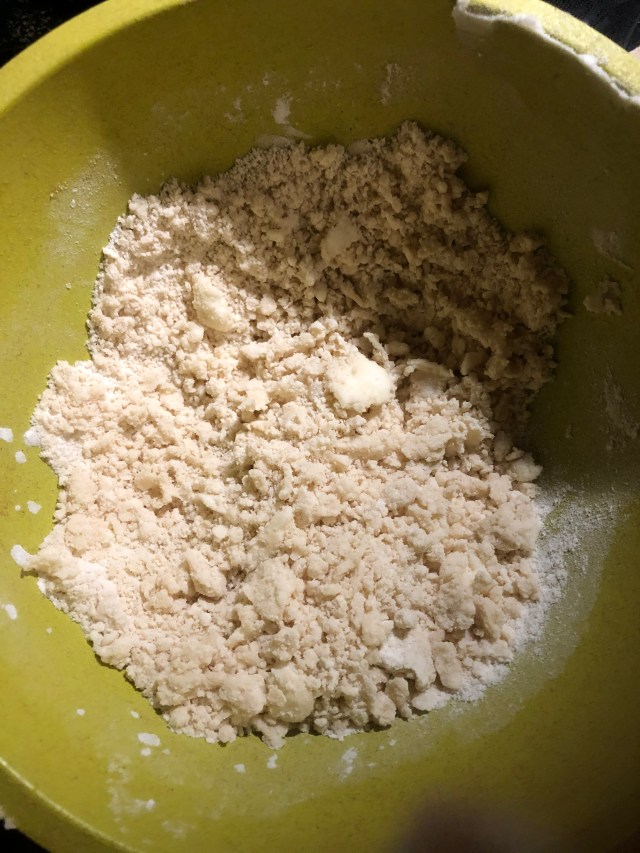
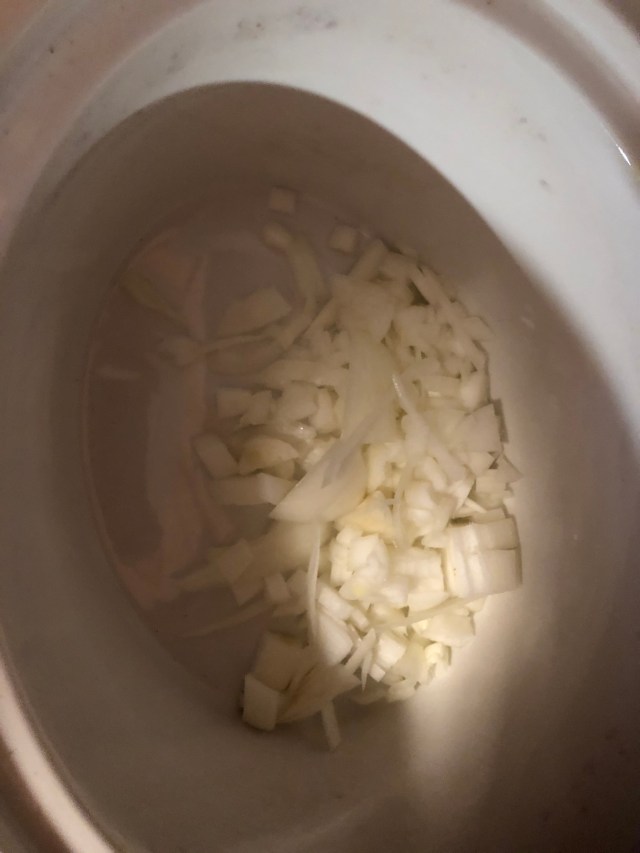
Now, take ¼ cup of shortening and cut it in with a big fork. In home ec, they taught us about the pastry cutter and how this is exactly what it was for. No one I knew growing up owned a pastry cutter. We used a giant fork labeled US Army. It was the biscuit fork. Unfortunately, I do not own a giant army fork, which means I’m usually stuck using a dinner fork. Definitely don’t use a salad fork. You’ll cry. Cut the shortening in until the mixture looks like coarse crumbs. Growing up, we always had a can of store brand Crisco vegetable shortening. This can be hard to find in today’s world, but I usually have a can around, just so I can make the biscuits I grew up with. I suppose I could use butter, but I never have, and it would feel weird.

bowl of ingredients, a dinner fork, and a measure of shortening

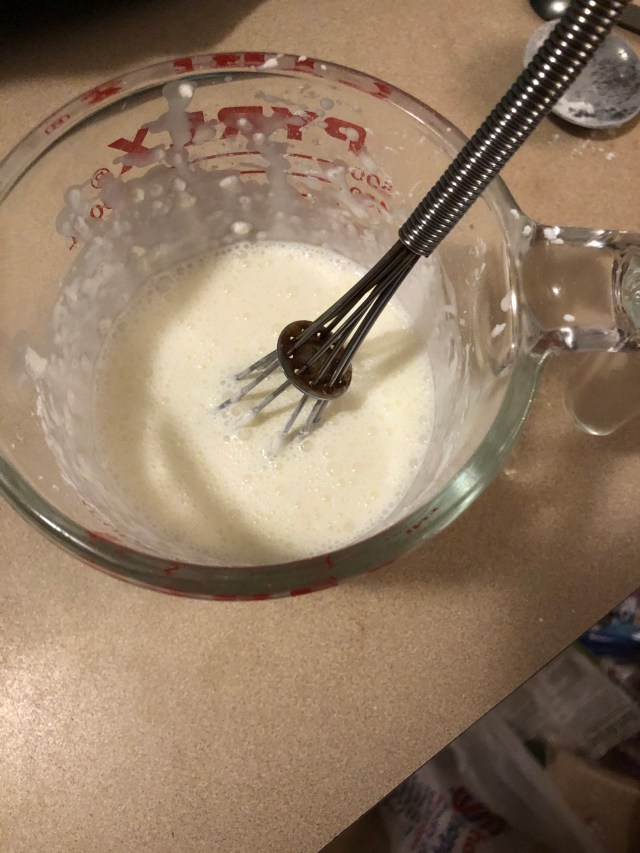
Once the mixture is all crumby, add in ¾ cup milk. It is also okay if the milk has gone sour. Just call it buttermilk and mix it in.

mixing in the milk

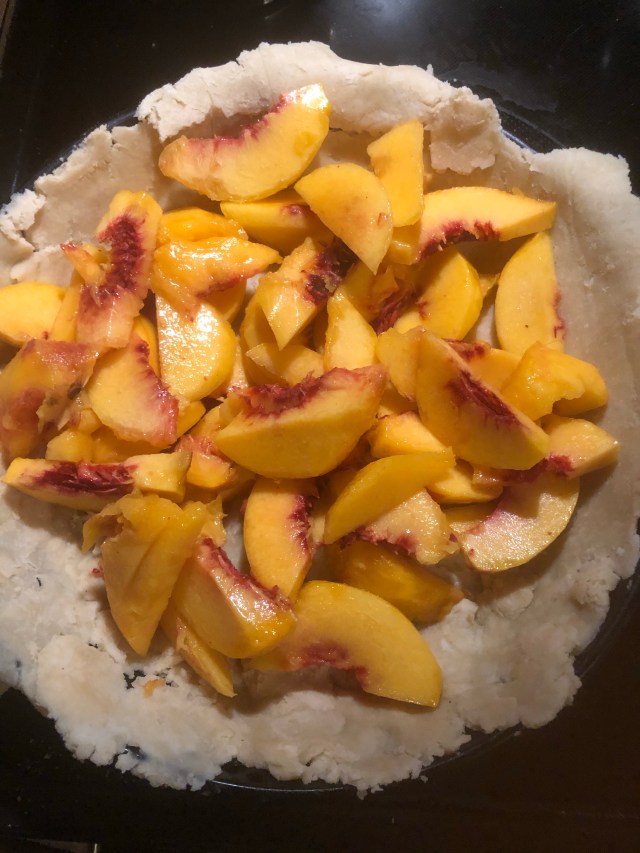
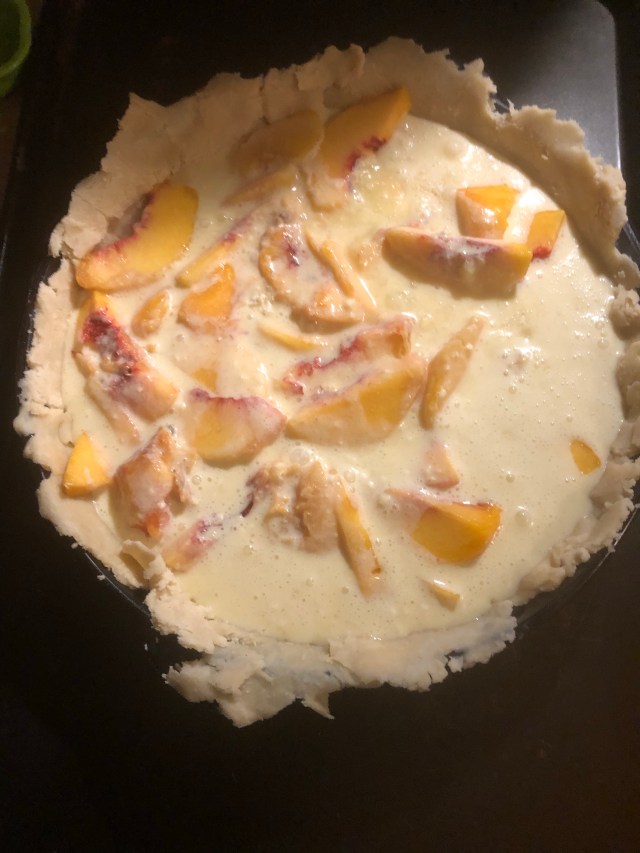
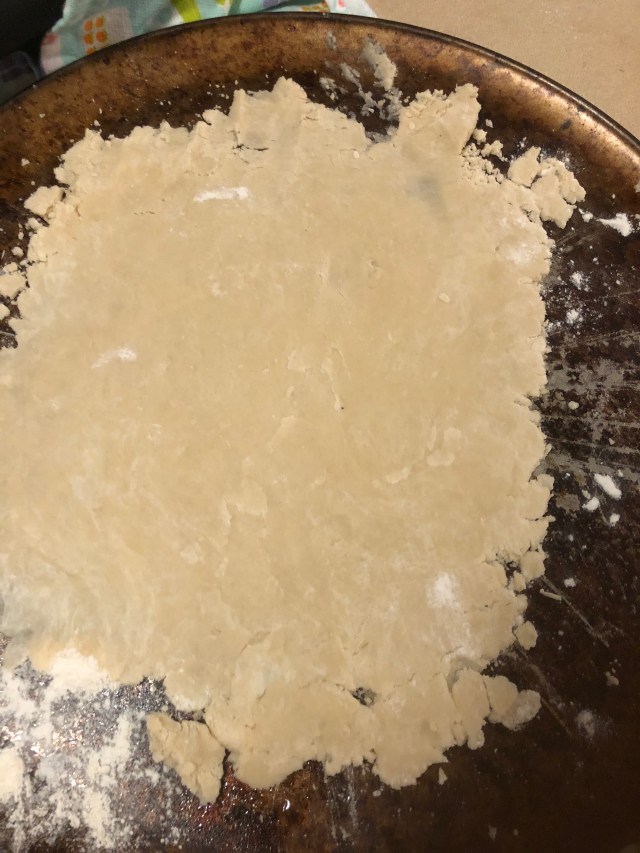
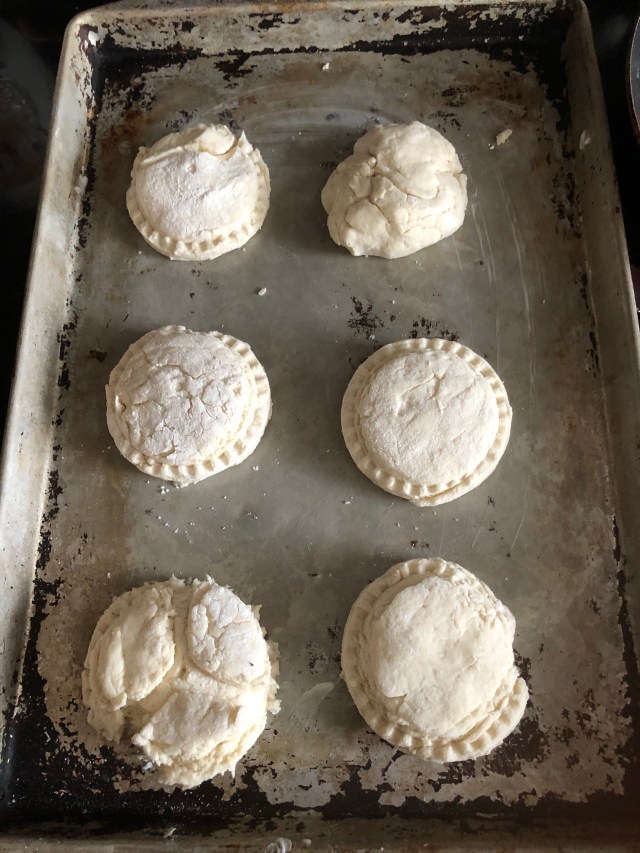
Next, sprinkle some flour onto the counter. If you don’t want to make a giant mess, you could do this on a pastry mat or even a cookie sheet. Dump the biscuit dough onto the floured surface and pat it into a circle. Don’t let it get too flat, or your biscuits will be flat. Keep it at least ½ inch. Take a floured biscuit cutter and make some circles. I finally broke down and bought a variety pack of circle cutters from Pampered Chef several years ago. I also have a crimped cutter I got from the giant yard sale crawl in New Market along route 11. You could even use a mug or a glass if you were desperate. Biscuits are not fancy food. They are practical. Use what you have, and you’ll be fine.

the dough patted out to a reasonable thickness

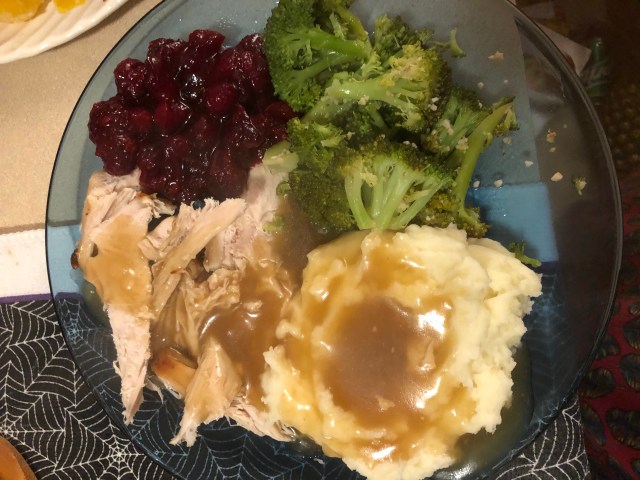
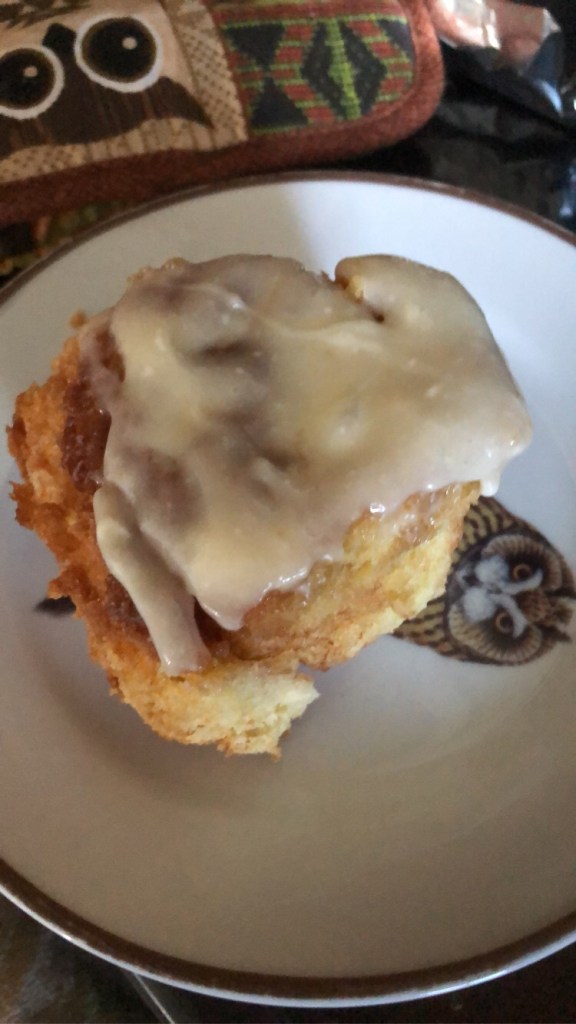
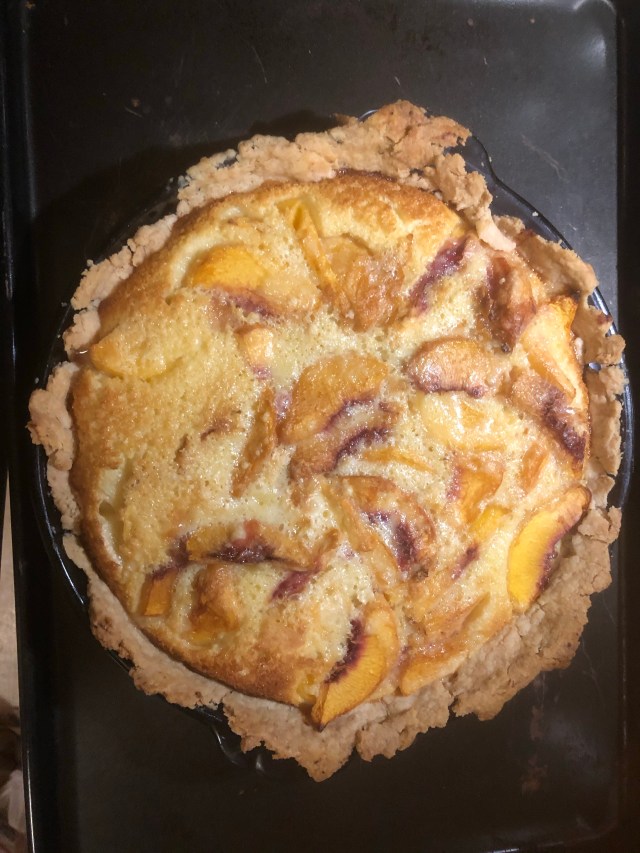
Place the biscuits onto a greased baking sheet and bake at 450 degrees for about 10-12 minutes. Top with butter or jam or cheese. Or make some sausage gravy and pour over for a real Southern treat.

a tray of cut biscuits: note the first one in the lower left got stuck and the upper right is created by slapping together all the remaining dough after the cutting is complete.

Baking Powder Biscuits

2 cups flour

¾ t. salt

1 T baking powder

1 T sugar

¼ c shortening

¾ c milk

Sift the flour (I skip this step), salt, and baking powder into a mixing bowl. Cut in shortening thoroughly. The mixture should look like corn meal. Add the milk all at once. Stir together quickly until the milk is blended. The dough should be light and soft. Turn out onto a lightly floured board, dip your hands in flour, and knead dough lightly and briefly—not more than half a minute. Pat or roll dough (always pat, never roll—don’t listen to the cookbook, listen to me) to ½ inch thickness, cut with a floured biscuit cutter, place several inches apart on greased baking sheet, and  bake in very hot oven, 450 degrees, for 10-12 minutes, until an even light brown.

snow day brunch, featuring biscuits with raspberry jelly

Pork with Brandied Cherries

pictured here with roasted sweet potatoes

Many cultures eat pork for the new year good luck. I grew up with the idea of pork and sauerkraut, but I’ve never been a big fan of sauerkraut. When I found this recipe in a Cooking Light magazine years ago, it became a staple for me–not only for new year, but for an easy, elegant meal.

When I first moved into my house, I had lots of friends coming over to help me get everything set up. It was July, so it was all the degrees. I wanted to make people something yummy for helping me. But it was 103 degrees outside, and the original version of this recipe called for baking the pork for 2 hours in an oven. Nope! So, I decided to try a slow cooker version, and it turned out perfectly! That’s the version you see above. But I’ll also give the directions for the oven version, which is suited to cold winter days when running the oven adds that extra little bit of warm to a chilly house.

The first step should be completed at least 2 hours before you turn on the stove or the slow cooker. I’ve been known to soak the cherries at least overnight. You need to take 1/2 cup dried tart cherries, which I usually find in bulk store, or in years when there’s not a pandemic and I get to go to Michigan, at a store there that sells Michigan cherry themed items. Specialty cherries are Not Required, of course, but they do add a fancy touch! Put the cherries into a bowl and add 1/2 cup of brandy. I usually use a small prep bowl with a lid, in case it gets knocked over.

the cherries in this picture soaked about a day. Also pictured is chicken broth, which will be used in a later step.

When the cherries are ready, get out the pork loin, about a 2 lb boneless one. Sprinkled dried mustard on all the sides of it, as well as some salt and pepper. If baking in the oven, I use a dutch oven for this step, because I’ll then add the rest of the ingredients and put the lidded pot into the oven. If doing the slow cooker version, I usually use a large skillet to brown all the sides of the meat.

brown the meat on all sides

While the meat is browning, chop an onion. Then, take the pork out of the pan. Add a little olive oil, and saute with about 3 cloves of chopped garlic until the onions are softened. This may take 5-10 minutes.

chop a medium-medium large onion

Add a cup of chicken broth. I preferred dried sodium free chicken broth that I reconstitute, as I don’t like how salty most prepared chicken broths are. Put the cherries, about a Tablespoon of current or cherry jelly (I usually put cherry), and 1/2 teaspoon of dried thyme. Once it boils, add the pork and a bay leaf.

If baking, put the lid on the dutch oven and bake in a preheated 325 degree oven for about 2 hours or until the meat is tender.

If slow cooking, transfer all ingredients to the slow cooker and heat on low for about 6-8 hours or high for 4-5.

transfer all ingredients to slow cooker

Serve with sweet potatoes and/or green beans.

Pork Loin with Brandied Cherries

original recipe from Cooking Light

1/2 c. dried tart cherries

1/2 c. brandy

1 t. dried mustard

1 t. pepper

1 t. salt

1 c. chopped onion (about one medium-large)

3 chopped garlic cloves

1 c. chicken broth (I suggest sodium free)

1 T. red current or cherry jelly

1/2 t. dried thyme

1 bay leaf

  1. Combine cherries and brandy and let soak for at least 2 hours.
  2. Preheat oven to 325 degrees.
  3. Sprinkle pork evenly with mustard, salt, and pepper. Heat a dutch oven over medium-high heat. Spray with cooking spray. Add pork, turning to brown each side lightly. Remove pork from pan.
  4. Reduce heat to medium. Add a splash of olive oil. Add onion and garlic. Cook 5-10 minutes, or until onions are softened.
  5. Add cherry mixture, broth, jelly, thyme, and bay leaf. Bring to a boil. Return pork to pan. Cover and bake at 325 degrees for 2 hours. If using slow cooker, transfer all ingredients to slow cooker, and cook on low 6-8 hours or high 4-5.

Reflections on 2020

This was a year for cross stitch and cooking!

Let’s face it. 2020 was not the best of years. It had a few good points, like lots of time in the spring, during lockdown, to cook and bake and work on my giant cross stitch that, after 4 years, is 1/3 done. Yes, I love ridiculously complicated projects!! Stitching is one of the things that helped me get through this year. Feeling stabby? Ok. go stab some fabric that already has holes with a blunt needle. No one gets hurt, and a gorgeous picture slowly appears!

Why did I need all the stress relief? A lot of it is the same reasons everyone faces–worry about the pandemic. In the spring, I was lucky enough to teach from home, but reading about all of the terrible things happening in the world started to sink me into a depression. There are so many ways our world is broken, which I won’t get into here. I did pretty well at going for walks through the summer months and posted pictures of my strange finds from walks on my Instagram. I cooked and baked for one.

In the fall, there was added stress with all of the political strife and worry. And I found out my job is ending with the school year. Budget cuts are hitting a lot of industries really hard right now. Colleges are among them.

As winter approached, I found it hard to cook at all. Walks disappeared. I didn’t have the energy to keep up with blogging. I started making a CV and applying for jobs, which takes a lot of time.

The holidays happened. First, it was Thanksgiving that got canceled. I was disappointed, but it’s better to keep my family safe and celebrate separately. I got myself and my kitty a turkey breast. I made cranberry sauce (I usually don’t have this with my Thanksgiving meal because I’m the only one who eats it, so I sometimes make it the next week.)

Thanksgiving meal–don’t mind the Halloween towel still in use in the kitchen

It wasn’t my first Thanksgiving alone. In 2019, I was alone for Thanksgiving as well, because I had caught whatever bug was going around campus, and I didn’t want to share that with family. I spent most of the holiday asleep. When I felt better, I made myself some proper food.

Christmas was harder. This was not my first time away from family for the holiday, but other times had been because I wanted to spend them with just my ex (who obviously wasn’t my ex at the time). We decided it was best to do the holidays with just us and then have time with each family before/after the holiday. Including one year when it was May before we got to see my family! Garrett County is known as the Snow Capital of the South according to Southern Living several years ago. Since 1977, the average amount of snow they receive is 133″ in a winter. Usually, I see family at Christmas only after a difficult plan of you can come in on this day between storms and you have to go on this day because it’s the one day it’s not snowing!

I haven’t seen my parents since Christmas 2019. They mailed me presents, and we had a Zoom opening. It’s hard to be away, but again, safety is important.

Usually, my family has turkey for Christmas. I asked Aspect what she would prefer. She asked for Mouse with Cheese. I told her that was not possible, but I promised her cheese. We settled on ham. We had cheese and crackers as an appetizer.

ham, corn, and asparagus Christmas dinner

I’d decided I wanted to make cinnamon rolls for Christmas morning. It was more like afternoon when they were done, but they were a lovely treat anyway.

Christmas cinnamon roll

Aspect has a great holiday–she got a bird stick and chased it all over the house. We ended up watching White Christmas. Aspect helped me work on my cross stitch a little.

being a kitty stich buddy is very tiring

The one thing I do know about 2021 is that it is going to be full of changes. I’m going to try to get back to posting recipes about once a week.

I’ll be teaching Food Writing in my final semester at my school, so there might be other types of posts as well as recipes.

I wish my readers all the best in 2021.

Peach Sangria

finished sangria

I know it’s not peach season anymore, but it’s still warm outside, even in November. And sometimes, you need a peach treat.

Sangria is really very easy to make. Don’t worry that peaches aren’t in season right now–you can use frozen fruit! This sangria is made with a white wine. You will probably want to choose one that is a little sweeter. I found a peach wine to use as the base.

To make a sangria, start with a 750 ml size bottle of wine. If serving a crowd, you can always double the recipe. This is so tasty, you might have a glass with a meal and celebrate by yourself!

a sweet peach wine makes a tasty base!

Pour the wine into a pitcher. Add to it 1/2 cup of peach schnapps. Cut 2 peaches into slices (if using fresh peaches), or add about 2 peaches worth of frozen peach slices (thawed).

sliced peaches

You can either add slices of fresh lemon or lime or both. I decided to squeeze in a lime.

a citrus press makes squeezing limes easy!

Give all of the ingredients a good stir and chill for a couple of hours. This will give time for the flavors to mix. This recipe makes about 4 servings.

Peach White Wine Sangria

originally from The Peach Cookbook

750 ml bottle of peach or sweet white wine

1/2 cup peach schnapps

2 peaches, pitted and thinly sliced (or use frozen peaches, if peaches are not currently in season)

1 lime or lemon, sliced (or squeeze the juice from either fruit)

In large pitcher, combine ingredients. Chill at least 2 hours before serving to allow flavors to mix and to cool to serving temperature.

Crustless Quiche with Spinach, Tomato, and Feta

finished quiche

Do you love quiche but don’t want to make a crust? Or want all the benefits and taste of quiche without the extra carbs? This is the recipe for you? And, it has that lovely spinach and feta combo!!!

Spinach and feta is one of my very favorites. I’m a big fan of feta, especially Bulgarian feta made from sheep’s milk. I can’t always find that in stores near me, but I have been able to locate several Greek kinds that at least are stored in brine. I always recommend getting whole pieces of feta that are brined because it keeps the cheese moist, not like those dried out pre-crumbled fetas.

So, let’s get started!

Preheat the oven to 400 degrees.

First, chop an onion and saute it in olive oil until tender and soft. I find that you can let it cook and keep and eye on it while preparing the spinach.

I find that buying a bunch of spinach at the grocery store is usually a sufficient amount. Wash the spinach and then take the really long stems off. Then, wilt the spinach in the pan with the onion. Yes, it looks like a lot when you first dump it in, but it’s really not. It gets much smaller while cooking down.

it looks like a lot here
but the amount is much smaller when wilted

Then, in a bowl, whisk together 4 eggs, a half cup flour, 1/2 teaspoon baking powder, and 1 1/2 cups milk. The original recipe doesn’t mention it, but I suggest adding about a teaspoon of dried basil.

egg mixture

Spray a pie plate or tart dish with cooking spray. Sprinkle the spinach mixture on the bottom of the pan. This way you can make sure there are no spinach clumps.

spread the spinach mixture around the bottom of the tart dish or pie plate

Then, pour the egg mixture over the spinach mixture.

see how that spinach is nicely spread throughout the quiche?

Then, sprinkle about a half cup of feta over the egg and spinach. Yes, it can be messy work, but it’s worth it!

look at that feta, so creamy and salty

Now, take some grape tomatoes and cut them in half. Arrange them around the quiche, so they add color and make a pretty pattern. It will depend on the size of your tomatoes how many you will need.

tomatoes artfully arranged

Bake it for 25-30 minutes until the center is set. Let it set a few minutes before cutting into it.

Spinach, Tomato, and Feta Crustless Quiche

(recipe originally from kylecooks.com)

1 Tbs. olive oil

1 onion diced (about a cup)

6 ounces fresh baby spinach leaves

4 eggs

1/2 cup all purpose flour

1/2 tsp. baking powder

1 1/2 cups milk

1 tsp dried basil

1/2 cup feta cheese

1/2 cup grape or cherry tomatoes, halved

  1. Preheat oven to 400 degrees.
  2. Lightly grease a 10″ quiche or tart pan or a deep dish pie plate
  3. Heat the olive oil over medium-high heat in a skillet, and saute the onion until softened.
  4. Add in spinach and cook until just wilted. Set aside to cool.
  5. Whisk together eggs, flour, baking powder, and basil. Whisk in milk and stir in spinach-onion (I put the spinach in first and then pour the egg mixture over the top).
  6. Pour egg mixture into quiche pan. Top with feta.
  7. Place the tomato halves on top.
  8. Bake for 25-30 minutes or until center is set and the edge is golden brown and pulling away from the sides.
  9. Cool for about 10 minutes before serving.

Easy Peaches and Cream Pie

completed peaches and cream pie

I love peaches! Peach season is never long enough for me. I think the best place to get peaches is the local farmer’s market, and that’s where the peaches from this pie came from.

The farmer’s market is definitely different in these Covid times, but I’m still so very glad it exists. I love to support local farmers and get some of the freshest, yummiest peaches.

I found this recipe in the Mennonite food column in the local paper. Wednesday is the day when the paper used to have a whole food section. Now, it’s pretty much down to the Mennonite column, which does have some tasty recipes.

So, let’s bake a peaches and cream pie! First, you’ll need a crust. 1 9″ unbaked crust, to be exact. You always have the option to buy one if making a pie crust is scary to you.

If you tried the last recipe, for the savory chicken and spinach galette, you’ll already know my pie crust recipe. If you didn’t, here it is again:

1 1/4 cup flour

1/2 tsp. sugar

1/2 tsp. salt

Mix these three ingredients in a bowl. Cut in 1/2 cup shortening until the mixture looks like coarse crumbs.

pie crust should look like coarse crumbs before any water is added

Add in just enough water (usually about 3-3 1/2 T) to make the dough stick together.

A pie crust rolling tip I learned from my mother is to roll the dough between two sheets of waxed paper. This way there is almost no mess because you don’t have to flour any surface or worry about messing up the dough as you transfer it to the pie plate.

My mother taught me to roll the dough between 2 sheets of waxed paper

Peel off one sheet of waxed paper, arrange the dough in the pie plate, and peel off the top layer of waxed paper. Then make the edges of the crust pretty (ok, so mine is a little rough in these pictures–the important part is that it tastes delicious, even if the edges are a bit uneven).

Slice about 3 cups of fresh peaches, washed and peeled and pitted and place them in your prepared crust.

Make sure you have enough peaches to fill the bottom crust of the pie

In a mixing bowl or very large liquid measure, combine 1 cup of heavy cream, 2 eggs, 3/4 cup sugar, 1/4 cup flour, 1 teaspoon of vanilla, and a dash of salt. Pour this mixture over the peaches in the prepared crust.

cream mixture poured over the peaches

Bake the pie in an oven preheated to 375 degrees for about 40-50 minutes. Another suggestion my mother taught me is to always place the pie plate on a baking sheet. That way, if anything drips over the top, it doesn’t get all over the floor of the oven. It’s much easier to scrub a baking sheet than it is an oven!

Easy Peaches and Cream Pie

(recipe from the Mennonite column in the Wednesday Daily News Record of Harrisonburg, Virginia)

3 cups fresh peaches, peeled and sliced

1 9″ pie crust (unbaked)

2 eggs

3/4 cup sugar (original recipe calls for a cup, but you can get away with 3/4)

1/4 cup flour

dash of salt

1 cup heavy cream

1 teaspoon vanilla

Place peaches in the pie crust. Beat eggs slightly in a bowl. Blend in sugar, flour, and salt. Stir in cream and vanilla; blend well. Pour over peaches. Bake at 375 degrees for 40 to 50 minutes, or until center shakes slightly when moved.

Chicken, Spinach, and Tomato Galette (Rustic Tart)

finished galette

The most common question I get about this recipe is “What is a galette?” Many people are unfamiliar with this term, which I only learned about a few years ago. A galette is a rustic tart, which means a pie crust in the most un-fancy of shapes. Simply put, this means you have permission to not worry about how pretty the final shape is! Does it get any easier?

Ok, let me guess. Now, you’re going to tell me you’ve never made a pie crust. And that pie crusts are scary and difficult and trigger your anxiety. If that’s you, buy a pre-made one.

If you’re willing to give it a try, this is the time to make your own pie crust? Why? Remember, a galette is rustic. That means if anyone tries to tell you it’s uneven or looks funny, that you were aiming for a rustic look!

Ready to give making your own crust a go? Then get out a bowl and measure 1 1/4 cups of flour and a half teaspoon of salt. Mix these two together and use a fork (or a pastry blender if you want to be fancy…I actually don’t own one of these yet. Might have to change that!) to blend in 1/2 cup of vegetable shortening. The goal here is to blend until you have coarse crumbs. Then add about 3 Tablespoons of water. I try to make sure my dough is a little on the drier side. You can always add a few more drops of water if it’s too dry, but you can’t take water back out.

you want the dough to look like coarse crumbs before you add the water

Once you have a dough that barely sticks together, sprinkle a little flour onto the pan and roll the dough out. I recommend a large pizza stone or pan. You can see I’ve made a lot of pizzas on mine!

look at that chaotic, I mean Rustic, shape!

Now, take a prepared jar of pesto (you could be fancy and make this yourself if you have a lot of basil on hand–I do not, so I bought the jarred kind) and spread a Tablespoon or two onto the crust. I went more towards 2 T. Make sure to leave a little room for a crust.

Spread some prepared pesto onto the crust.

Preheat the oven to 375 degrees. While the oven is preheating, heat some olive oil in a large, deep skillet (or even a wok). Chop an onion (or use a half of an onion if it’s large) and saute it in the oil until it’s translucent and tender. Add a clove (or several–I’m always a fan of extra garlic!) of chopped garlic.

While the onion is sauteing (or perhaps before–it might take a bit), you’ll want to clean your spinach if you’re using fresh spinach. I also like to take the stems off, especially on the bits that are very long. If you prefer, you can use frozen spinach. If you choose to go that route, you’ll want to make sure it’s thawed and squeeze out excess moisture. Then add then add the spinach to the cooked onion and garlic mixture. Cook until the spinach wilts. Add in shredded cooked chicken–you could use prepared rotisserie chicken for this. I had made a slow cooked roasted chicken a few days before, so I used the last of it in this recipe. Then add in about 1/2 cup of the pesto and a bit of black pepper. Stir this mixture up.

chicken, onion, garlic, spinach, and pesto mixture

Now, it’s time to spread the mixture over your prepared crust. Don’t worry too much about what it looks like. It’s supposed to be rustic, remember?

spread the mixture over the crust

Top this with shredded mozzarella cheese and slices of roma tomato.

top with cheese and tomatoes

Now, bake for 20–25 minutes. Then, cut and eat!

Chicken, Spinach and Tomato Galette

from the newspaper Food section, which reprinted the recipe from Pillsbury: The Big Book of More Baking with Refrigerated Dough by Grace Wells, Editor

1 9″ pie crust (homemade or store bought)

1/2 cup pesto (and 1-2 T for crust)

2 T. Olive oil

1/2 c. chopped onion

1 clove garlic, minced

6 c. fresh spinach (or kale , or frozen spinach, thawed and drained)

2 c. shredded cooked chicken

1/4 t. black pepper

1/2 c. shredded mozzarella cheese

1 medium roma tomato, sliced

Heat oven to 375 degrees. Flour a pizza stone or baking sheet and roll out crust onto it. Spread 1-2 T pesto onto crust, leaving a 1-2″ crust.

In a large non-stick skillet on medium, heat oil. Cook onion and garlic 1-2 minutes or until tender, stirring often. Stir in spinach, chicken, pepper, and remaining pesto. Cook 2-3 minutes, or until greens are wilted and chicken is heated. Stir often. Spoon chicken mixture over center of crust to cover pesto. Sprinkle with cheese. Fold edges of crust over filling, pleating if needed. Top with tomato.

Bake 25-30 minutes or until crust is golden. Let stand 5 minutes before cutting.

Peaches and Creme Brulee French Toast

finished French toast with peach topping

Peaches are my favorite summer fruit! And this dish highlights them in a wonderful, decadent way. It’s an overnight recipe, so it’s best for a weekend or any time you could have a brunch. This recipe is one of my favorites. It came from a cookbook I found at a thrift store. The cookbook has recipes from Virginia Bed and Breakfasts. This one comes from the Inn at Monticello.

To start, you’ll need a loaf of day old French bread (I picked up a sale loaf at the store, and it was perfect).

Take a 9×13 baking dish and spray with cooking spray. Set aside.

In a medium saucepan, melt a stick of butter (1/2 cup), 1 cup of packed brown sugar, and 1/2 cup corn syrup. Cook and stir until smooth. Pour into the prepared pan.

prepared pan with creme brulee mixture

Next, slice the bread into thick slices, about 1″ thick. Layer the bread slices over the top of the creme brulee mixure until the pan is full.

Next, make the French toast mixture. In a bowl or very large measuring cup, combine 6 large eggs, 1 1/2 cups half and half, a splash of vanilla, 1/4 teaspoon salt, and 1 teaspoon of Triple Sec.

Pour the mixture over the bread slices. Cover and refrigerate overnight. This part is great to do at midnight!

mixing the French toast mixure
Pour the egg mixture over the bread

The next morning, take the casserole out of the fridge and let it stand for about a half hour. Preheat the oven to 350 degrees. Bake the casserole for 30-35 minutes.

While the French toast is baking, slice about a pound of peeled peaches. Combine them in a bowl with 1/4 cup of sugar and 1/4 cup of peach brandy. I imagine that the toast would be just as good with peaches without alcohol and sugar, as I’d used all of my peach mixture before I got to the end and topped it with plain sliced peaches. Still amazing and delcious!

To serve, put the French toast creme brulee side up and top with the peach mixture.

Peaches and Creme Brulee French Toast

from The Inn at Monticello from the Virginia Bed and Breakfast Cookbook

1 stick butter (1/2 cup)

1 cup packed brown sugar

1/2 cup corn syrup

about 10 1″ thick slices French bread

6 large eggs

1 1/2 cups half and half

1 t. vanilla extract

1 t. Triple Sec

1/4 t. salt

1 pound fresh or frozen peeled, sliced peaches

1/4 cup white sugar

1/4 cup peach brandy

Spray a 13×9 baking dish with cooking spray. Melt butter, brown sugar, and corn syrup in a saucepan over medium-low heat. Cook, stirring until smooth, then pour mixture into baking dish. Put bread on top of butter mixture. Whisk together eggs, half and half, vanilla, Triple Sec, and salt; pour over bread. Cover and refrigerate overnight.

The next day, let French toast stand at room temperature for 30 minutes. Preheat oven to 350 degrees. Bake French toast for 30-35 minutes. While French toast is baking, put peaches in a bowl. Add white sugar and peach brandy; stir to combine. Put 1-2 pieces of French toast on each plate, brown sugar side up. Top with some peaches to serve.

Chicken Tikka Masala in a Slow Cooker

finished dish, served over basmati rice

It’s hot outside, and you don’t feel like cooking something complicated. You’d love to have Indian food, but don’t want to go to a restaurant in this pandemic? What do you do? Well, if you’re reading this today, not in the morning, it might be time to reach for your emergency can of Spaghetti O’s or make a grilled cheese sandwich as slow cooking does take a bit of time. But it’s so easy! Dump in the ingredients, make sure the cooker is plugged in (been there and done that before with a similar recipe) and turned on. 8 hours later, and dinner is ready!

You will want to take time to make some basmati rice to go along with this, but you can do that when you add the heavy cream towards the end. I’d also recommend some naan bread as a side dish (especially garlic naan). You can either buy or make that.

So, what do I put in the slow cooker? About 3 pounds of boneless, skinless chicken, cut into bite size pieces. A lot of recipes call for breast, but I feel like thigh is actually more flavorful. Either, or a mixture is fine.

In a large bowl, combine a yellow onion, chopped, 4 cloves of minced garlic, 2 T. minced ginger (I usually keep a jar of minced ginger on hand, as I use it often, but not a lot at one go), 1 large can of tomato puree (28 oz, also called crushed tomatoes with some brands), 1 1/2 cups plain yogurt, 2 T. olive oil, 2 T. lemon juice, 2 T. garam masala, 1 T. ground cumin, 1 1/2 t. paprika, 1 t. salt, 3/4 t. cinnamon, 3/4 t. black pepper, and 1 1/2 t. cayenne pepper. Mix it all together and pour over the chicken. Add two bay leaves. Cover and cook on low for 6-8 hours.

I mixed it all and poured it over the onions. Works just as well!

6-8 hours later, mix 1 cup heavy cream with 1 1/2 t. cornstarch. Pour mixture in and stir to combine all. Cover and cook for about 20 minutes. Use this time to prepare some basmati rice. I recommend a rice cooker to make this step as easy as possible.

combine cream and cornstarch
Stir the cream mixture in, cover, and cook for about 20 minutes.

Chicken Tikka Masala in a Slow Cooker

recipe found on cookingclassy.com

3 lb boneless skinless chicken (breast or thigh)

1 large yellow onion, finely diced

4 cloves garlic, minced

2 T. grated/minced ginger

1 28 oz can tomato puree/crushed tomatoes

1 1/2 cups plain yogurt

2 T. olive oil

2 T. lemon juice

2 T. garam masala (look for this in international food stores)

1 T. cumin

1 1/2 t. paprika

1 t. salt (to taste)

3/4 t. cinnamon

3/4 t. black pepper

1-3 tsp. cayenne pepper (I went with 1 1/2)

2 bay leaves

1 c. heavy cream

1 1/2 t. cornstarch

  1. In a large mixing bowl, combine onions, minced garlic, minced ginger, tomato puree, plain yogurt, olive oil, lemon juice, garam masala, cumin, paprika, salt, cinnamon, pepper, and cayenne pepper.
  2. Stir until combined. Pour half of sauce mixture into a large slow cooker, then add in diced chicken, followed by the rest of the sauce mixture. Add in two bay leaves. Cover slow cooker with lid and cook on low heat for 6-8 hours or high heat for 3-4 hours.
  3. In a large liquid measure, whisk together heavy cream and cornstarch. Pour mixture into slow cooker and gently stir. Allow mixture to cook 20 minutes while you prepare basmati rice. Remove bay leaves before serving.

Blueberry Lemon Cake with Lemon Cream Cheese Frosting

a finished slice of cake

One of my best friends adores blueberries and was about to turn 40, so I decided to find a new cake recipe. This one is a triple layer cake that uses fresh blueberries and a lemon to make. The frosting has cream cheese and more lemon. If you’ve tried my blueberry muffin recipe, you already know that blueberry lemon is a great combination, so I knew immediately the cake would also be delicious!

Don’t be put off by worries about a cake with three layers. All a third layer means is an extra few swipes of frosting atop another layer to stick them together. Three is just as easy as two!

First, gather 3 9″ round cake pans and spray them with Baker’s Secret (it’s like Pam spray, but with flour). I used to grease them with shortening and sprinkle flour over that, but the spray is so easy!

Preheat the oven to 350 degrees and set the pans aside. In a bowl, measure 1 1/2 cups of granulated sugar. Zest a whole lemon into the sugar. To zest, take a zester (a small grater) and rub it over the skin of a washed lemon. Don’t forget to take the bar code sticker off if your lemon came from a grocery store (pretty much the only place I can get a fresh lemon in VA–it gets hot in the summer, but not lemon-growing hot!).

Lemon freshly grated into sugar

Mix that up a bit, and let it sit a few minutes for the flavors to settle. Then, mix in 2/3 cup softened butter (I keep butter in the freezer and set it out overnight to soften) and 3 eggs.

the butter has been mixed with the lemon sugar. Now 3 eggs are added.

Next, add in 1 1/2 tsp. of vanilla extract. Then, in a separate bowl, combine the dry ingredients of 2 3/4 cups cake flour (all-purpose will turn out fine if you don’t have cake flour, though it might be less delicate), 1 tsp. salt, and 3 1/2 tsp baking powder (3 tsp.= 1 T, so if it’s easier for your brain, 1 T and 1/2 tsp).

Combine the liquids in a liquid measuring cup: 1/2 cup milk and 1/4 cup lemon juice (I juiced half of the huge lemon I already zested). Alternate adding liquid and dry mixtures into the cake batter until all is combined.

Then, wash the blueberries and dust them with flour to keep them from sinking to the bottom.

blueberries coated with flour

Divide the batter equally among the 3 prepared pans. Smooth the batter in the pans so it bakes evenly. Bake for 25-30 minutes or until a toothpick inserted in the center comes out clean.

only 2 of my pans fit in the picure!

You can let the cakes cool in the pans or on a wire rack. Usually, I let them cool in the pans for about 10 minutes and then switch them to wire racks, but I was having a Zoom call with my dad, so the cakes were left to cool in the pans. This turned out not to impede removing them at all!

Then, to make the frosting, take 2 8 ounce packages of cream cheese and 4 Tbs of softened butter (about a half stick) and put them in a bowl with 4 cups of powdered confectioner’s sugar, the juice from other half of the lemon (it really was a huge lemon!), and a tsp of vanilla extract. Using an electric mixer, mix it all up. I’m usually very much the mix things by hand sort of person, but I like how easy it is to get the frosting really smooth with a mixer.

Then, once the cake is cool, turn one layer onto the cake plate upside down. Cover the center with frosting. Add the next layer, again, upside down. Repeat the frosting swipe. Put the top layer on, this one right side up. Cover the sides of the cake with frosting, as well as the top.

Here you can see the frosting between the cake layers as well as it starting to appear on the sides.

When the cake is all frosted, you can decorate the top. I had some leftover blueberries, but no remaining frosting, so I decided to put Happy Birthday in blueberries. It turned out to take up a lot of cake space with blueberries, so I ended up with HB 40.

This recipe comes from flouronmyfingers.com

Cake

1 1/2 cups sugar

2 T. lemon zest (I zested one huge lemon)

2/3 cup butter, softened

3 large eggs

1 1/2 tsp. vanilla extract

2 3/4 cup cake flour

3 1/2 tsp. baking powder (aka 1 T and 1/2 tsp)

1 tsp. salt

1/2 cup milk

1/4 cup lemon juice

1 1/4 cups blueberries (washed)

Frosting

16 oz cream cheese, softened (2 8 oz bricks)

4 T. butter, softened

1 tsp vanilla extract

1 T. lemon juice (I used more–the other half of the lemon)

4 cups powdered sugar

  1. Preheat oven to 350 degrees.
  2. Grease 3 9″ round cake pans with cooking spray/flour or use the shortening and flour method to grease them.
  3. Mix together the sugar and lemon zest. Then let this mixture sit for 3-5 minutes, so the lemon can really infuse into the sugar.
  4. In a separate mixing bowl, mix together the cake flour, baking powder, and salt. Set aside. In a liquid measure, combine the milk and lemon juice. Set aside.
  5. Cream the butter into sugar lemon zest mixture.
  6. Add the eggs, one at a time, into the sugar mixture.
  7. Then mix in the vanilla extract.
  8. Alternate the dry ingredients with the milk and lemon juice mixture. Keep alternating, adding the milk and lemon juice and ending with the dry ingredients.
  9. Toss the blueberries in a T. of cake flour, and then gently fold the flour-coated blueberries into the cake batter. Use a spatula, not a mixer.
  10. Spread the batter evenly into 3 round greased cake pans.
  11. Bake at 350 for 25-30 minutes or until a toothpick inserted in the center comes out clean.
  12. Allow the cake to cool in the pan for about 10 minutes before turning onto a wire rack to finish cooling.
  13. To mix up the lemon cream cheese frosting quickly and easily, I use a mixer.
  14. Mix together the softened cream cheese and butter.
  15. Add vanilla extract and lemon juice, mixing in well.
  16. Then add in the powdered sugar, mixing until smooth and creamy,
  17. Now, you’re ready to frost and layer your cake. I usually like to frost between layers as I add them. Then frost all over the outside of the cake, including the sides.
  18. Then you can add blueberries and lemon slices to the top, whatever your preference.